Nothing set yet
One Simple Bird Net for $20, on the Balcony, baited with Poplar Mushroom Food · Mushrooms Satiety +1.5 Morale -3 Life +1 100 g 1×1 cells 15.0 Satiety/kg $3 10 d shelf life Waste at day 15 Mushrooms Requires cooking. Tough when eaten raw. . It returns 6.58 Satiety a day where it stands and 0.64 on the 1st Floor, which is the whole argument for reading the room table before you buy a second one. Do not fill all 11 placements yet. Each trap is another $20 every 4 captures until the skill moves.
Scrap but no money
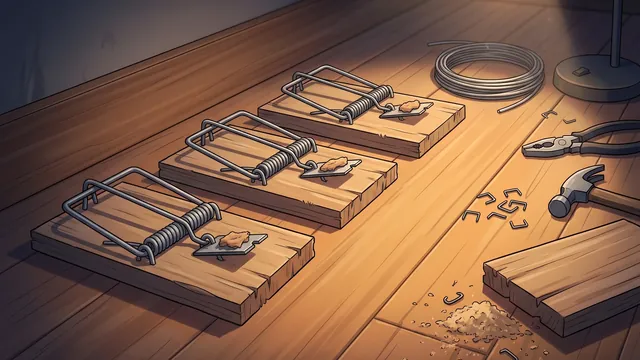
Craft. Every trap has a Workbench recipe, and every material any of them asks for is ordinary salvage worth $10. Simple Mousetrap is the cheapest at Crafting 2 for Wood Chips, Scrap Metal, which is $20 of salvage against a shelf price of $20. The recipe is worth using when you have the scrap and not otherwise. Iron Animal Trap is the exception worth the trouble: no shop stocks it at all, it is the strongest trap on the 1st Floor, and it is the only recipe of the 4 that can fail and swallow part of the materials.
Traps breaking faster than they pay
Stop buying traps and level Trapping. A capture spends 200 durability at every level below 3, which is what makes a trap a consumable rather than a fitting. At Trapping 3 the cost falls to 150 and at Trapping 5 to 50, so the same Iron Animal Trap survives 6 captures untrained and 24 at the top. The Trapping ladder costs 25,170 experience end to end, and the game pays it for taking prey out of traps.
Open the supplies list The 4 traps, the 19 animals and the 167 foods that carry a bait profile all sit in the supplies list, with the prices, the weights and what each one gives eaten.
Trapping is one weighted draw, repeated on a clock. A trap carries a list of animals with a weight each, plus a weight for catching nothing, and every 16 hours it draws once from that list. The room multiplies every animal’s weight before the draw, and a multiplier of zero deletes that animal from the room. So placement does not make a trap better or worse at its job. It decides which animals are in the draw at all.
This page sets out the draw, what the bait profiles do to it, what a capture costs in durability, and what a house full of traps returns against what a day costs.
The four numbers the system runs on
| Quantity | What it is | Where it sits | Range in the game |
|---|---|---|---|
| Draw weight | One animal's share of a single capture, before the room touches it | 4 traps, 19 animals between them | 0.1 to 1 |
| Empty weight | The "caught nothing" outcome, which sits in the same draw as the animals | 4 traps | 6 to 9 |
| Room coefficient | What a room multiplies each weight by, zero included | 8 rooms, 4 of them with placements at home | 0 to 2 |
| Durability and capture cost | A stock the trap starts with, and what one capture takes out of it | 4 traps | 800 to 1200 durability, 200 a capture |
The first three decide what one capture is worth. The fourth decides how many captures you get, and it is the one that decides whether trapping is worth doing at all, because a trap is spent rather than owned.
What one capture actually is
Take the Iron Animal Trap on the 1st Floor, which is the strongest pairing in the house. The trap carries 7 animals and an empty weight of 9. The room multiplies each animal’s weight by its own coefficient, and the draw is every surviving weight over the total.
| Outcome | Trap weight | 1st Floor × | Weight in the draw | Chance | Satiety |
|---|---|---|---|---|---|
| Green Snake | 0.3 | 0 | 0.00 | 0.0% | 12.5 |
| Rat | 0.4 | 2 | 0.80 | 6.3% | 11.5 |
| Squirrel | 0.8 | 0 | 0.00 | 0.0% | 17.5 |
| Gray Rat | 0.5 | 0.5 | 0.25 | 2.0% | 12 |
| Wild Rabbit | 0.8 | 2 | 1.60 | 12.5% | 18 |
| Hedgehog | 0.5 | 1.5 | 0.75 | 5.9% | 15 |
| Weasel | 0.4 | 1 | 0.40 | 3.1% | 13 |
| Nothing | 9 | not touched | 9.00 | 70.3% | 0 |
2 of the 7 animals are gone before the draw starts, because the 1st Floor multiplies them by zero. The remaining weights add up to 3.80 against an empty weight of 9, which is why a capture comes up empty 70.3% of the time even in the room this trap suits best.
Multiply each chance by its Satiety and one capture is worth 4.49 Satiety on average. At 1.5 captures a day that is 6.73 Satiety a day from one trap.
The room decides what you can catch
| Room | Slots | Best trap here | Empty | Sat/day | Mostly catches |
|---|---|---|---|---|---|
| 1st Floor | 4 | Iron Animal Trap | 70% | 6.73 | Wild Rabbit, Rat |
| Basement | 4 | Simple Mousetrap | 52% | 6.29 | Mouse, Black Rat |
| 2nd Floor | 1 | Live Capture Cage | 67% | 5.01 | Pigeon, Sparrow |
| Balcony | 2 | Simple Bird Net | 57% | 6.58 | Pigeon, Sparrow |
The rooms with no placements matter as much as the ones with them. 4 of the 8 rooms the game defines offer nowhere at home to set a trap: Sunroom, Cold Storage, Warehouse Interior, Outdoors. The Warehouse Interior and the Outdoors are the only rooms in the game that leave all 19 animals in the draw, against 11 at best in the rooms you can build in. Their coefficients are in the data and they never come up in your house.
The prey worth the most Satiety is available in exactly one room. Wild Rabbit Food · Meat Satiety +18 Morale -3 2000 g 3×3 cells 27.0 Satiety/kg 10 d shelf life Waste at day 15 Meat A pleasant surprise found darting from the weeds. One is enough for a meal. is worth 18 Satiety, more than any other animal a trap can take, and of the rooms you can build in it appears only on the 1st Floor, at 2× weight. The game’s own note on that room mentions mice and rats and says nothing about it.
The best trap is different in every room
| Trap | 1st Floor | Basement | 2nd Floor | Balcony |
|---|---|---|---|---|
| Simple Mousetrap | 6.24 | 6.29 | 2.55 | 1.79 |
| Live Capture Cage | 5.86 | 5.81 | 5.01 | 5.88 |
| Simple Bird Net | 0.64 | 1.53 | 4.85 | 6.58 |
| Iron Animal Trap | 6.73 | 3.67 | 2.33 | 2.33 |
Read down each column and the pattern is the house itself: the ground floor and the basement hold the animals that live indoors, and the upstairs rooms hold birds. A bird net downstairs returns 0.64 Satiety a day against 6.58 upstairs. That is most of the trap’s value gone to one placement.
Iron Animal Trap Trap 800 g 1×1 cells Keeps indefinitely An advanced trap with higher durability and wider capture range. is the best trap on the 1st Floor despite carrying the highest empty weight of the 4 at 9, which is 71% of its own draw before any room touches it. Its prey list is short, and short in the right way.
What a full house returns
| Room | Slots | Trap | Each | Room total | At level 5 |
|---|---|---|---|---|---|
| 1st Floor | 4 | Iron Animal Trap | 6.73 | 26.9 | 41.5 |
| Basement | 4 | Simple Mousetrap | 6.29 | 25.2 | 33.9 |
| Balcony | 2 | Simple Bird Net | 6.58 | 13.2 | 18.4 |
| 2nd Floor | 1 | Live Capture Cage | 5.01 | 5.0 | 7.5 |
That is 70 Satiety a day untrained and 101 at Trapping 5, against the 48 the Wage Slave burns in a day. Put it beside the planter: the highest-yielding crop returns 3.38 Satiety per pot cell per day, so covering the same 48 takes about 15 cells running without a break. One trap placement is worth roughly 1.9 planter cells and needs no light.

Durability is the whole cost
Every capture spends 200 durability, the same on all 4 traps. What differs is the stock each one starts with, so the number of captures a trap survives is its durability divided by that cost.
| Trap | Durability | Captures | At 5 | Price | Sat/$ | Sat/$ at 5 |
|---|---|---|---|---|---|---|
| Simple Mousetrap | 800 | 4 | 16 | $20 | 0.84 | 4.52 |
| Live Capture Cage | 1000 | 5 | 20 | $20 | 0.98 | 5.72 |
| Simple Bird Net | 800 | 4 | 16 | $20 | 0.88 | 4.91 |
| Iron Animal Trap | 1200 | 6 | 24 | not sold | 0.90 | 5.54 |
Put the last two columns against the shelf. The best food you can simply buy, White Sugar Food · Seasonings Satiety +5 Morale -1 500 g 2×1 cells 50.0 Satiety/kg $10 360 d shelf life Waste at day 1800 Seasonings Cook or use directly , returns 2.50 Satiety per dollar. Every trap is below that untrained and every trap is well above it at Trapping 5, and the reason is one line of the skill table: a capture costs 200 durability untrained and 50 at the top, which multiplies the life of every trap you own by 4.
One caveat on that Sat/$ column. No shop stocks Iron Animal Trap, which the Workbench is the only source of, so the dollars in that row are what the item is worth and not what it costs you.
| Trap | Sold for | Crafting level | Materials | Can fail |
|---|---|---|---|---|
| Simple Mousetrap | $20 | 2 | Wood Chips, Scrap Metal | no |
| Live Capture Cage | $20 | 3 | Waste Plastic, Scrap Metal ×2 | no |
| Simple Bird Net | $20 | 3 | Scrap Paper, Broken Glass, Scrap Metal | no |
| Iron Animal Trap | no shop stocks it | 4 | Scrap Paper, Broken Glass, Waste Plastic, Scrap Metal | yes |
Every material on that list is ordinary salvage worth $10, so each of the sold traps costs at least as much in parts as it costs on the shelf. Craft when you have scrap and no money, buy when you have money and no scrap, and note that Iron Animal Trap has no shelf price to compare against and is the only recipe that can fail.
Bait
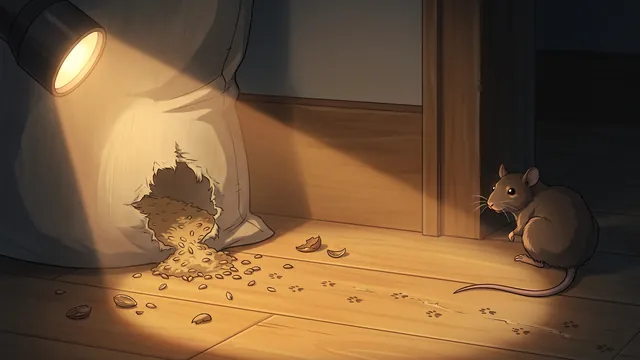
Bait is a third weighting on the same draw. 167 of the game’s items carry a bait profile, and there are only 8 distinct profiles between them, so most of those foods are interchangeable as bait. Within a profile the cheapest food is exactly as effective as the dearest. Each profile sorts all 19 animals into three bands, favoured, middling and disfavoured, and lists nothing else. There is no entry for the empty outcome and none for a trap or a room, so a profile is a statement about which animal turns up and about nothing else on this page.
| Top band favours | Avg Satiety | Band sizes | Cheapest foods in the profile |
|---|---|---|---|
| Squirrel, Wild Rabbit, Guinea Pig | 16.2 | 3 / 5 / 11 | Poplar Mushroom, White Beech Mushroom, Straw Mushroom |
| Wild Duck, Squirrel, Wild Rabbit, Guinea Pig | 15.6 | 4 / 6 / 9 | Sauerkraut, Coffee, Potato |
| Bat, Squirrel, Wild Rabbit, Guinea Pig | 14.0 | 4 / 8 / 7 | Strawberry, Banana, Fuji Apple |
| Green Snake, Wild Duck, Crow, Weasel | 13.1 | 4 / 3 / 12 | Catfish, Frozen Catfish Fillets, Canned Herring |
| Green Snake, Gray Rat, Gecko, Toad, Crow, Hedgehog, Weasel | 11.4 | 7 / 5 / 7 | Dried Worms, Gecko, Chicken Feet |
| Mouse, Rat, Squirrel, Black Rat, White Mouse | 10.8 | 5 / 2 / 12 | Marshmallows, Spicy Tofu, Fruit Candy |
| Mouse, Green Snake, Rat, Black Rat, Gray Rat, White Mouse | 10.2 | 6 / 3 / 10 | Egg, Protein Powder, Marinated Eggs |
| Mouse, Rat, Pigeon, Black Rat, Gray Rat, Sparrow, Turtle Dove, White Mouse | 9.5 | 8 / 4 / 7 | Frozen Corn, Organic Fragrant Rice, Grilled Sausage |
The mushroom profile is the one to bait with. Its top band is Squirrel, Wild Rabbit, Guinea Pig, worth 16.2 Satiety on average, and its three cheapest foods are Poplar Mushroom, White Beech Mushroom, Straw Mushroom. At the other end sits a band of Mouse, Rat, Pigeon and the rest of the small stuff, worth 9.5 on average, off foods like Frozen Corn, Organic Fragrant Rice, Grilled Sausage. That is 6.7 Satiety between the top band of the best profile and the top band of the worst, on the same trap in the same room.
That makes Poplar Mushroom the most efficient bait in the game. It costs $3 and only 1.5 Satiety to give up, and it sits in a profile whose top band holds Wild Rabbit. It is also one of the crops that grows with no light at all, so a dark room of mushrooms and a floor of traps feed each other.
What the level table changes
| Level | Rank | What it adds | Capture cost | Captures from the Iron Animal Trap |
|---|---|---|---|---|
| 1 | Trainee Hunter | Failed Hunt Chance -10% | 200 | 6 |
| 2 | Apprentice Trapper | Unlocks home trap cards in the main interface. Rare Prey Weighting +2 | 200 | 6 |
| 3 | Skilled Hunter | Capture Durability Cost -50 | 150 | 8 |
| 4 | Senior Hunter | Failed Hunt Chance -10% → -20% Rare Prey Weighting +2 → +4 | 150 | 8 |
| 5 | Master Trapper | Failed Hunt Chance -20% → -50% Capture Durability Cost -50 → -150 | 50 | 24 |
2 of the 5 levels move the draw and 3 move the cost, and they are not the same levels. Levels 1 to 3 all take the same 10% off the empty weight, so the chance of an empty capture does not budge until Trapping 4. The cost of a capture does not budge until Trapping 3. Level 5 is the one that changes the build, because half the empty weight and a capture cost of 50 arrive together.
Note also what the level table does not carry: the interval between captures is 16 hours at every level and on every trap, so nothing you do makes a trap fire more often. More captures means more traps.
![[Main Quest] Cook a Hot Meal](/art/1301_g.webp)
Everything you catch has to be cooked
| Prey | Satiety | Morale raw | Rarity | Where it appears |
|---|---|---|---|---|
| Wild Rabbit | 18 | -3 | 2 | 1st Floor |
| Squirrel | 17.5 | -5 | 3 | 2nd Floor, Balcony |
| Hedgehog | 15 | -4 | 3 | 1st Floor, Basement |
| Wild Duck | 14 | -4 | 2 | 2nd Floor, Balcony |
| Guinea Pig | 13 | -4 | 3 | 1st Floor, Basement, 2nd Floor, Balcony |
| Crow | 13 | -4 | 2 | Balcony |
| Weasel | 13 | -5 | 3 | Basement, 1st Floor |
| Green Snake | 12.5 | -4 | 3 | Basement |
All 19 animals give negative Morale eaten raw, from -3 to -6. Prey is an ingredient rather than a meal. Run a catch through a recipe and the same animal becomes a dish that pays Morale instead of charging it; how cooking works has what decides the quality, and the recipes list filters by an animal to show what it can go into.
The rarity band is worth reading, because it does not track value. 6 animals sit in the rarest band 3, and they run from Squirrel at 17.5 Satiety down to White Mouse at 7.5. Wild Rabbit, the heaviest animal in the game, is band 2 rather than band 3.
Worked examples
What one trap returns over its whole life
The Iron Animal Trap on the 1st Floor is worth 4.49 Satiety a capture and survives 6 captures untrained, so from new to broken it returns 27 Satiety. A day costs 48. One whole trap is about 56% of one day’s food.
At Trapping 5 the same trap is worth 6.92 a capture and survives 24, so its life returns 166 Satiety, or 6.2 times as much off the same 4 pieces of salvage. Nothing about the trap changed. The skill did.
What Trapping 5 does to the draw
The empty weight is 9 and level 5 takes 50% off it, leaving 4.5. The animal weights are untouched at 3.80, so the total falls from 12.8 to 8.3 and every animal’s share goes up without any weight of its own changing.
| Outcome | Untrained | At Trapping 5 |
|---|---|---|
| Wild Rabbit | 12.5% | 19.3% |
| Rat | 6.3% | 9.6% |
| Hedgehog | 5.9% | 9.0% |
| Weasel | 3.1% | 4.8% |
| Gray Rat | 2.0% | 3.0% |
| Nothing | 70.3% | 54.2% |
A cut of 50% on the weight is a cut of 16.1 points on the chance, because the weight sits in a total that also holds the animals. The two numbers are not the same thing, and the game’s own wording is about the weight.
Filling the house, and what it costs to keep filled
11 placements filled with the best trap for each room return 70 Satiety a day, and every one of them is on its way to breaking. A trap that survives 4 to 6 captures at 1.5 a day lasts 2.7 to 4.0 days. Add that up across the 11 placements and a full house is 3.5 traps to rebuild every day, for as long as you want the 70 Satiety.
At Trapping 5 the same house returns 101 Satiety a day and the same Iron Animal Trap lasts 16 days rather than 4, which brings the rebuilding down to 0.9 traps a day. That is the case for the skill in one line: the Satiety goes up 1.4× and the upkeep goes down 4×.
What to do
- Buy a Simple Bird Net and set it on the Balcony. It is the best return of any trap a shop sells, 6.58 Satiety a day.
- Match the trap to the room from the table above rather than buying one kind for the whole house. The wrong trap in a room is not slightly worse, it is near worthless.
- Bait with Poplar Mushroom. Bait changes which animal turns up and never how often one does, so pick on the profile and buy the cheapest food in it.
- Cook everything. All 19 animals cost Morale raw.
- Push Trapping to 5 before you fill every placement. Below it a trap returns less Satiety per dollar than White Sugar Food · Seasonings Satiety +5 Morale -1 500 g 2×1 cells 50.0 Satiety/kg $10 360 d shelf life Waste at day 1800 Seasonings Cook or use directly off the shelf and breaks in 4 to 6 captures.
- Make an Iron Animal Trap once Crafting reaches 4. No shop stocks it and it is the best trap on the 1st Floor.
Quick reference
- Placements at home: 11 across 1st Floor 4, Basement 4, 2nd Floor 1, Balcony 2.
- The clock: one capture attempt every 16 hours on every trap, which is 1.5 a day and does not change with the level.
- A full house returns 70 Satiety a day untrained and 101 at Trapping 5, against 48 a day burned.
- Best prey: Wild Rabbit, 18 Satiety, only on the 1st Floor.
- Best bait: Poplar Mushroom, $3.
- Capture cost: 200 durability, falling to 50 at Trapping 5.
- Nowhere to trap: Sunroom, Cold Storage, Warehouse Interior, Outdoors have no placements in your house.